Time to take a look inside the new Sheeva64 and see what has changed from the original SheevaPlug.
There is an introduction post located at https://www.drassal.net/wp/index.php/2019/09/24/sheeva64-by-globalscale-technologies-first-thoughts/ with some initial testing and thoughts on this new platform. The manufacture’s website is located here https://www.globalscaletechnologies.com/p-86-sheeva64.aspx where you can order your very own Sheeva64.
With a new toy, we all have to take it apart to see what makes it “tick” don’t we? There is a “warranty void if seal broken” sticker holding the two halfs together, but, nothing that an exacto knife won’t fix! Removing the four friction fit rubber feet to expose the standard Philips screws, and in a few minutes we have the two halfs apart.
This wasn’t just for the pictures, but I did some JTAG experimenting as well, and will follow up in another post about my findings with the JTAG, but story short, I can detect the Marvell Armada 3720, and connect in, but that is as far as I have gotten. I need more detail about the low level initialization to go further. This must be in the u-boot source code if I dig deep enough.
Now what we all have been waiting for, the internal pictures of the new Sheeva64! This is also very similar to the GlobalScale Technologies EspressoBin single board computer (same 64-bit Arm based Marvell Armada A3720 SoC, so those who have the EspressoBin should notice some similarities.
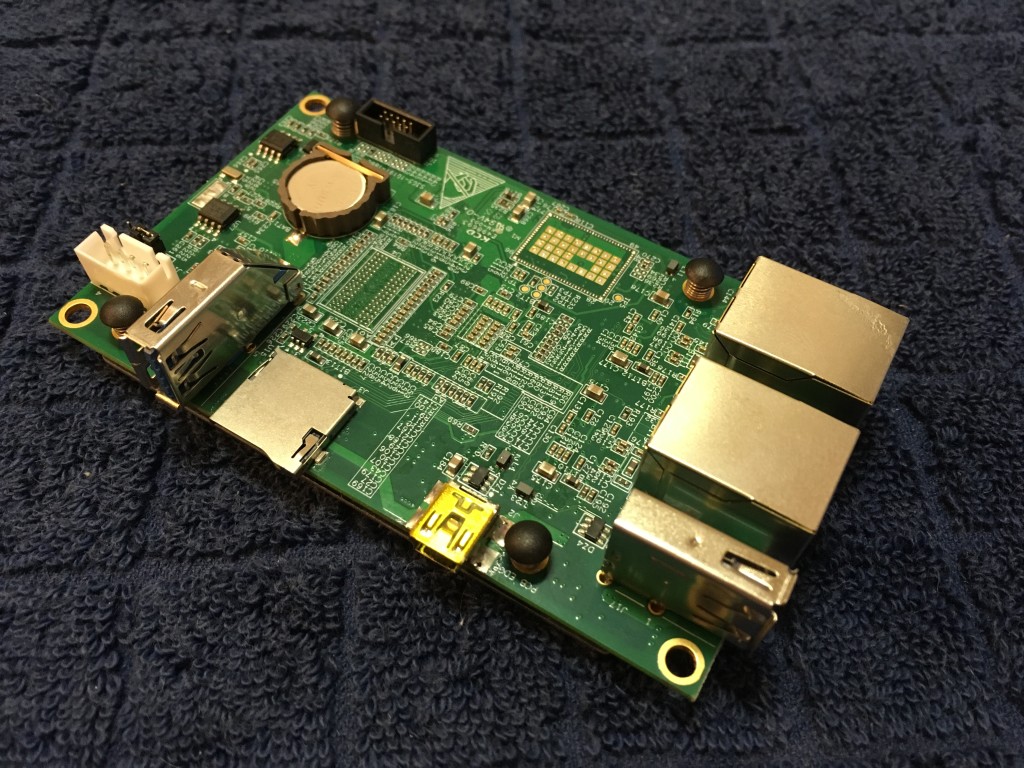
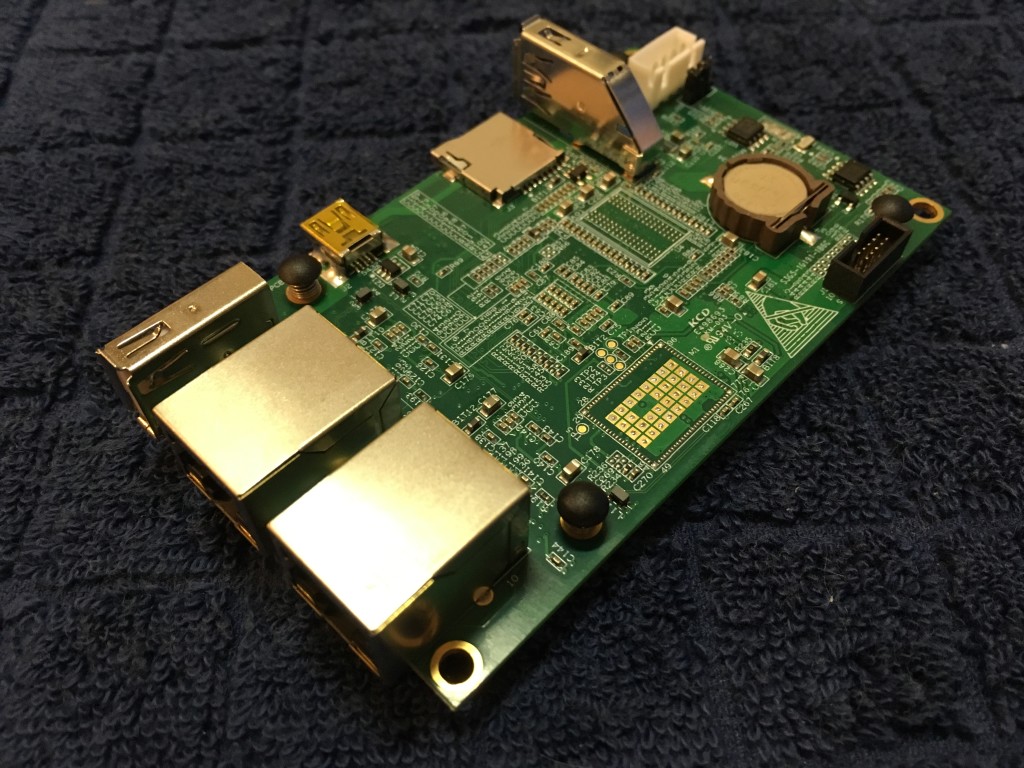
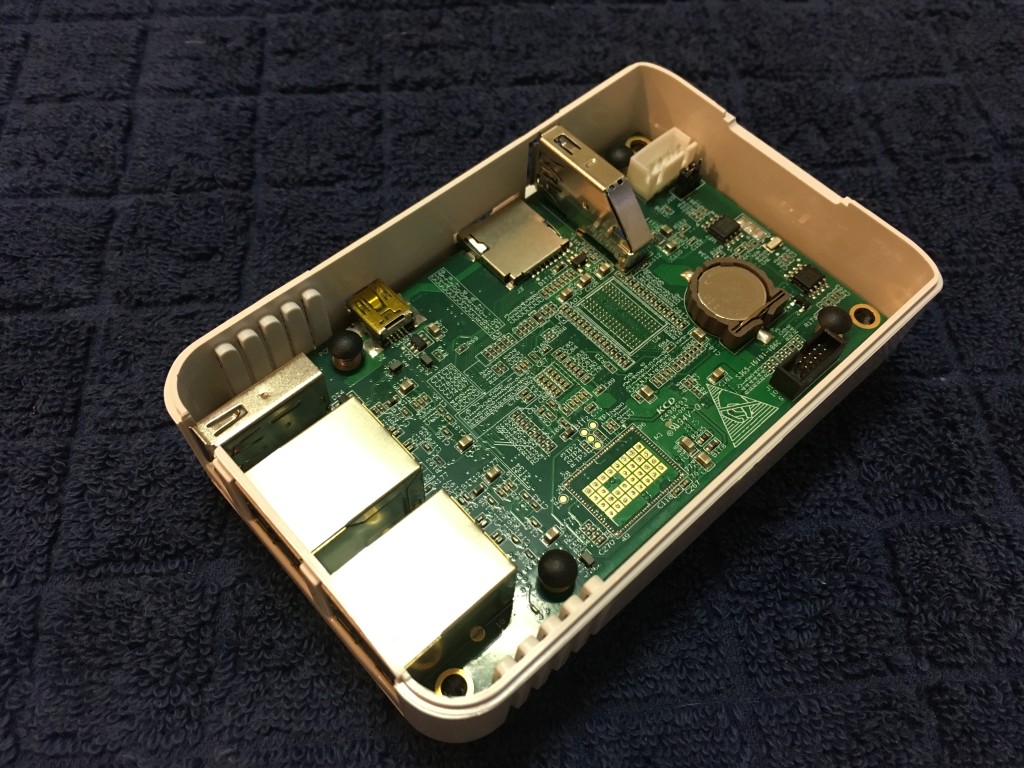
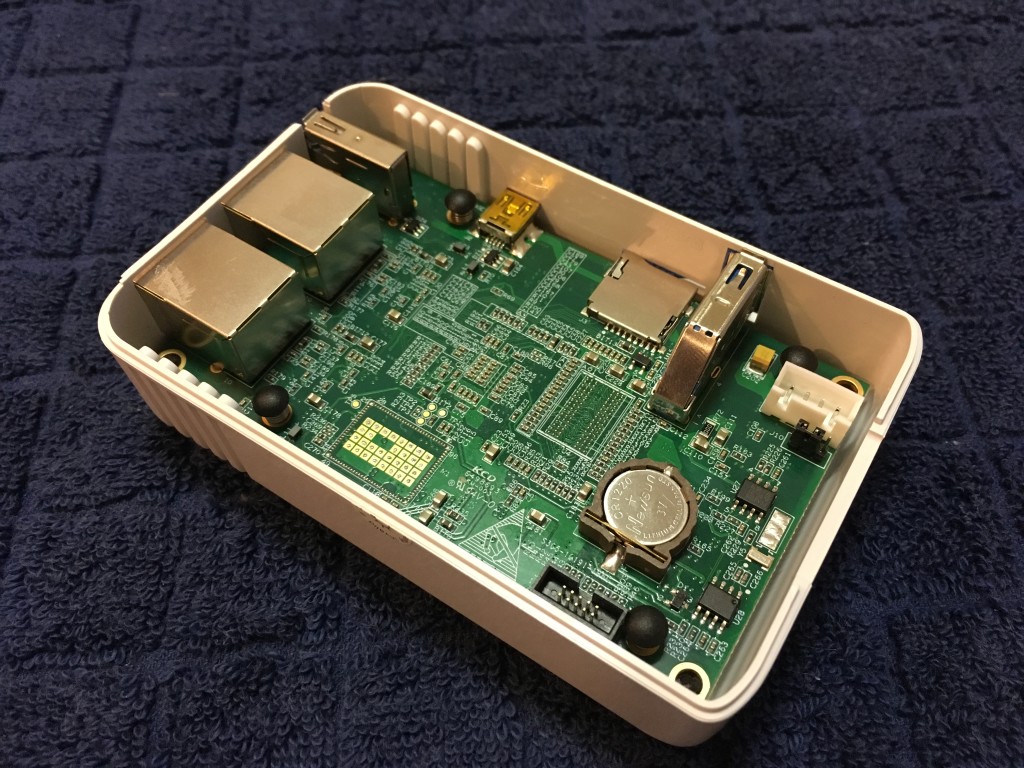
We can see that the Sheeva64 has a real RTC (real time clock) to keep time when not powered, which is a very welcomed feature. It is rare to find on single board computers these days, mostly to save cost I suppose… the Sheeva64 comes with a RTC and a battery to keep time, just like your desktop or laptop computer.
This is the non-WiFi version, we can see the pads where the WiFI and one more DDR4 chip would be placed. This model only has 1GB of DDR4, but there is a place reserved for one more DDR4 memory chip.
The two gigabit ethernet ports are visible, along with the USB2.0 and USB3.0 ports. There is an external SD card slot also visible and the mini-USB for the serial console and u-boot tweaking/repair.
We also have the 10-pin standard JTAG connector visible, along with the jumper to set boot mode (Armada 3270 internal ROM or external SPI). The boot mode from the factory is of course SPI, the internal ROM mode is used to invoke the internal ROM boot loader, which can be used for recovery purposes. However, if the SPI does not load up right, you might end up in the ROM boot loader anyway regardless of the jumper setting.
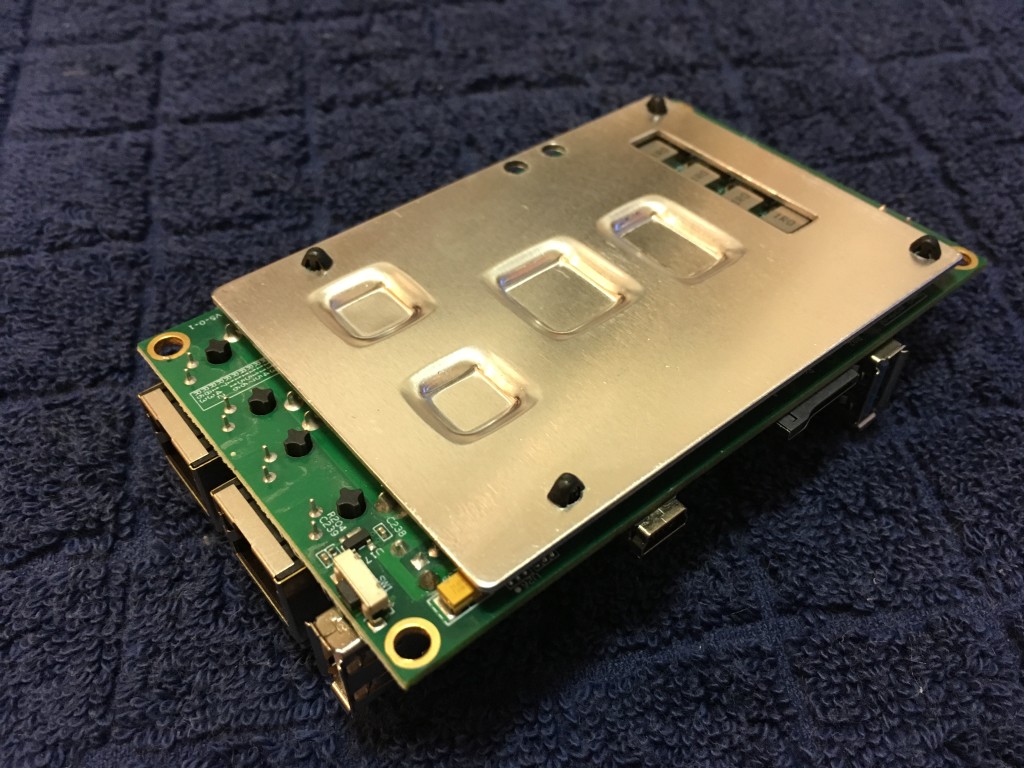
I did not remove the heat sink off the bottom of the board, but the Marvell Armada 3720 will be located under that large aluminum heat sink. This is a fanless design, while I believe the original SheevaPlug had a fan inside it. Will have to do some testing and load up the CUP with some Gentoo source compiling (will happen soon) and see how the temperatures are. The heatsink and chips are interfaced with some thick white/greyish colored thermal tape the stuff, the kind of stuff often seen interfacing graphics card memory chips to heatsinks.
A very clean and compact board design, all with a dual core 64-bit processor.
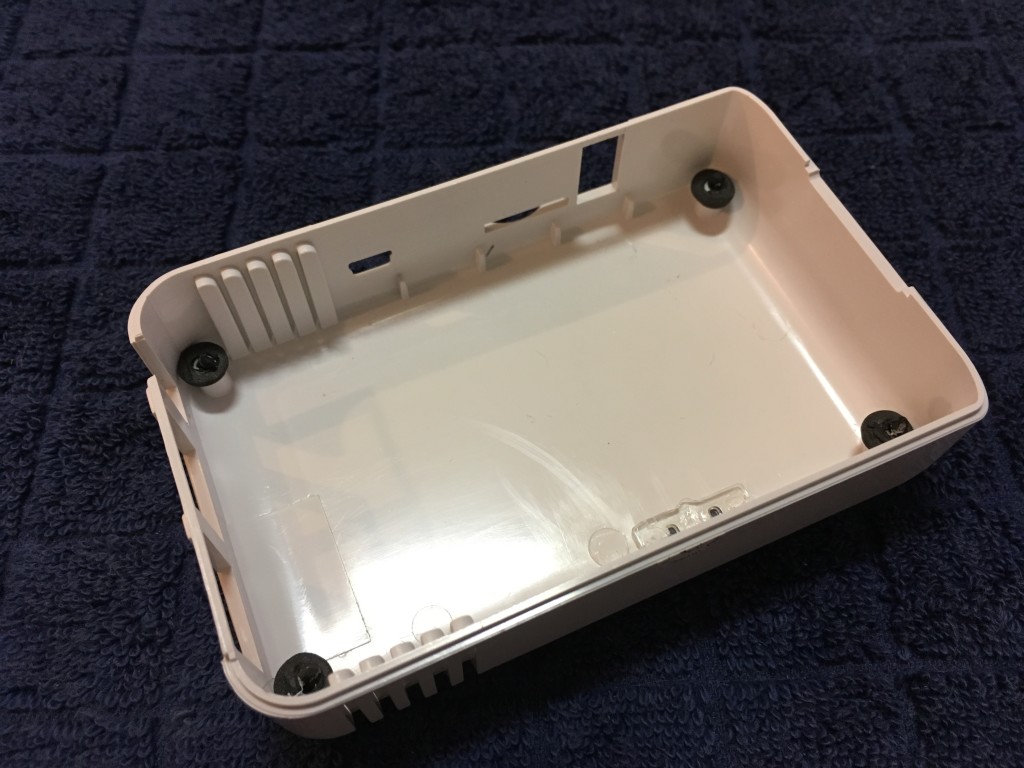
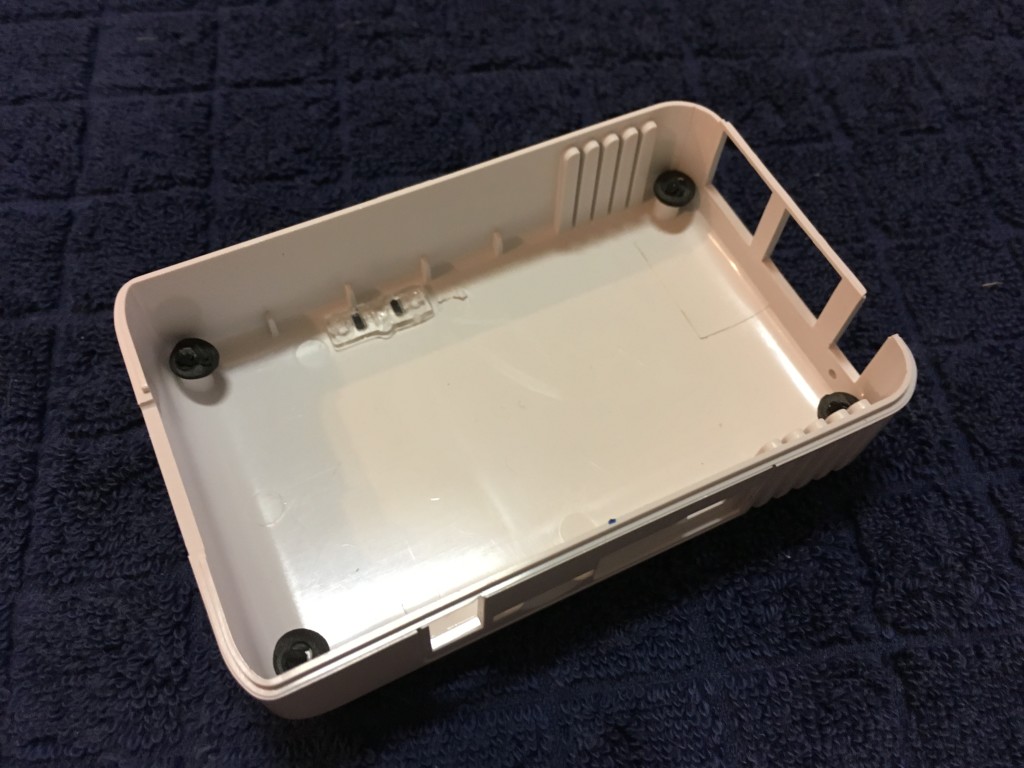
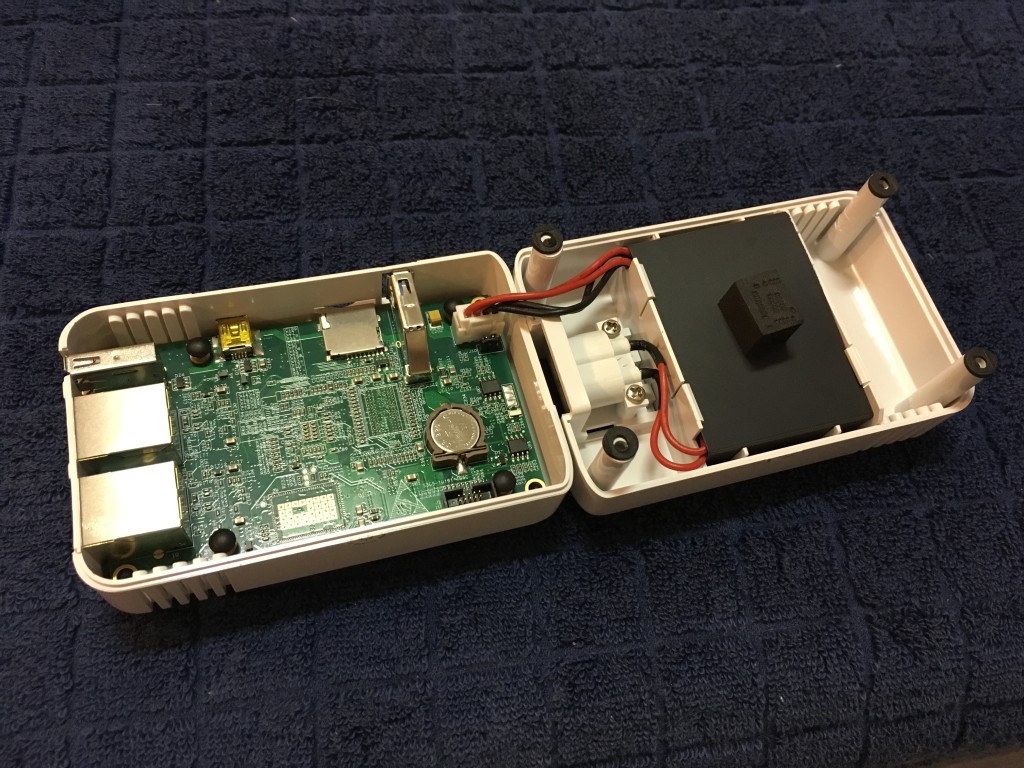
The plastic case is generous in space and everything appears to have ample space to spare, but this does carry over the same case dimensions as the original SheevaPlug, the insides have been updated, however.
It is worth noting that the screw holes for the four screws holding the top and bottom halfs together appear to be a little soft, and not that deep, keep that in mind that you might not want to disassemble and reassemble too many times, the screw holes may be stripped. The first time reassembling the screws did not seem to grip well and I may have already stripped mine out to a degree, so it is a good idea to keep that in mind for reassembling.
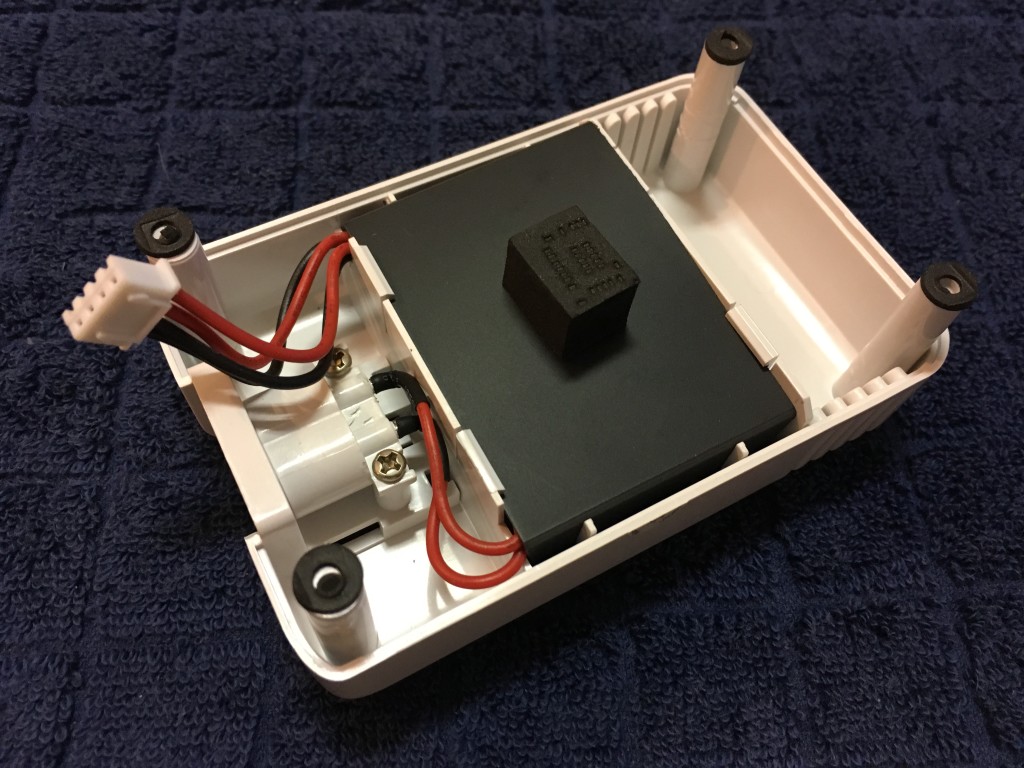
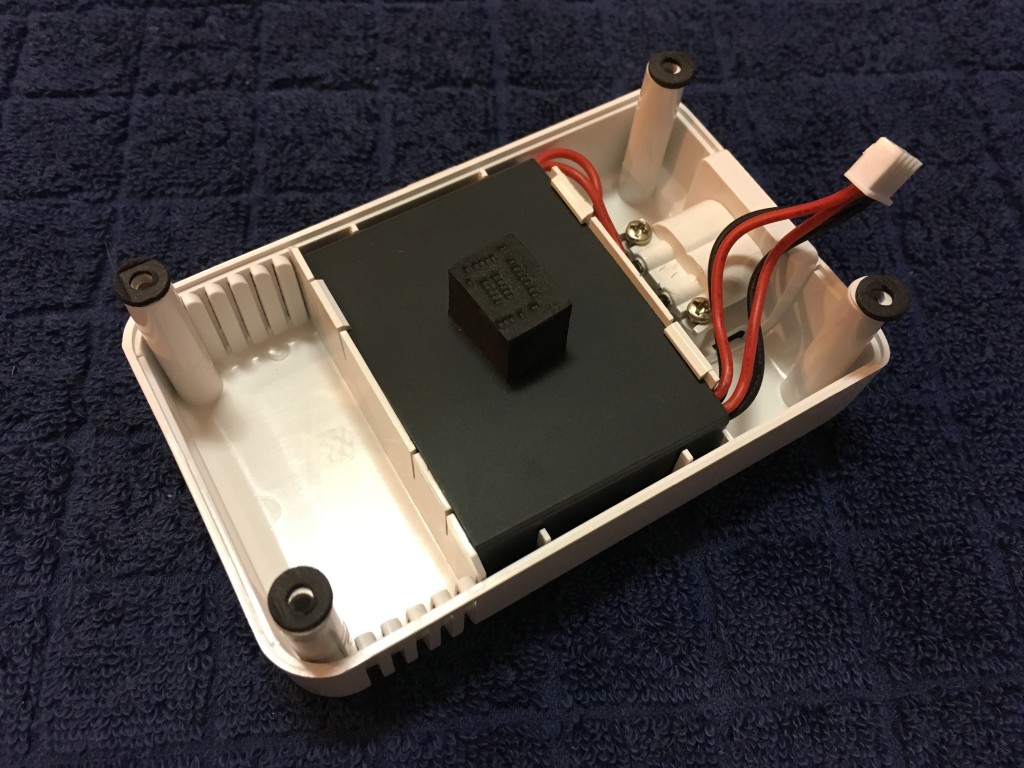
The power supply is very compact, but appears to be able to supply 900mA to the USB ports… not specific if that is total current between both ports, or the current for each port. There is a small cushion pushing up against the PCB, I believe to hold the power supply in place and avoid rattles. The original SheevaPlug did have some occasional issues (a small failure rate) with failed power supplies, the part for the original SheevaPlug is available at this URL, https://www.globalscaletechnologies.com/p-48-sheevaplug-power-supply.aspx, but not 100% sure it is a suitable replacement for the Sheeva64. I am hoping that improvements were made on the power supply to reduce the failure rate.
Besides the slight concerns about the power supply, for the $89 USD (non WiFi/Bluetooth) or $105 USB (WiFi/Bluetooth included) including internal power supply, it is not a bad price for a dual core 64-bit single board (all self contained) computer that can literally just be plugged in anywhere.
I will be digging into the u-boot and recovery methods in another post soon. If, by chance, anyone has a bricked (u-boot is corrupted or gone) device before then, leave a comment below and I will see if I can provide you with what you need to recover the SPI flash on your Sheeva64.
