
As I am occasionally doing more and more RFID related tasks at work, and curious about the data stored on all these RFID devices that I see more and more I got ahold of a Proxmark3 RDV 4.01 to gain more insight to RFID and help out with development.
Running on MacOS am completely new to the Proxmark3, take that back, about 10 years ago I got a Proxmark3 but at the time RFID was not as wide spread and never got a change to get a lot of use out of it. Fast forward, what really peaked my interest is the use of RFID in some interesting products such as the recently released Savi’s Workshop Handbuilt Star Wars Lightsabers at Hollywood Studios Disney World. It is easy to find information on YouTube or search engines about the RFID use in these cool new items.
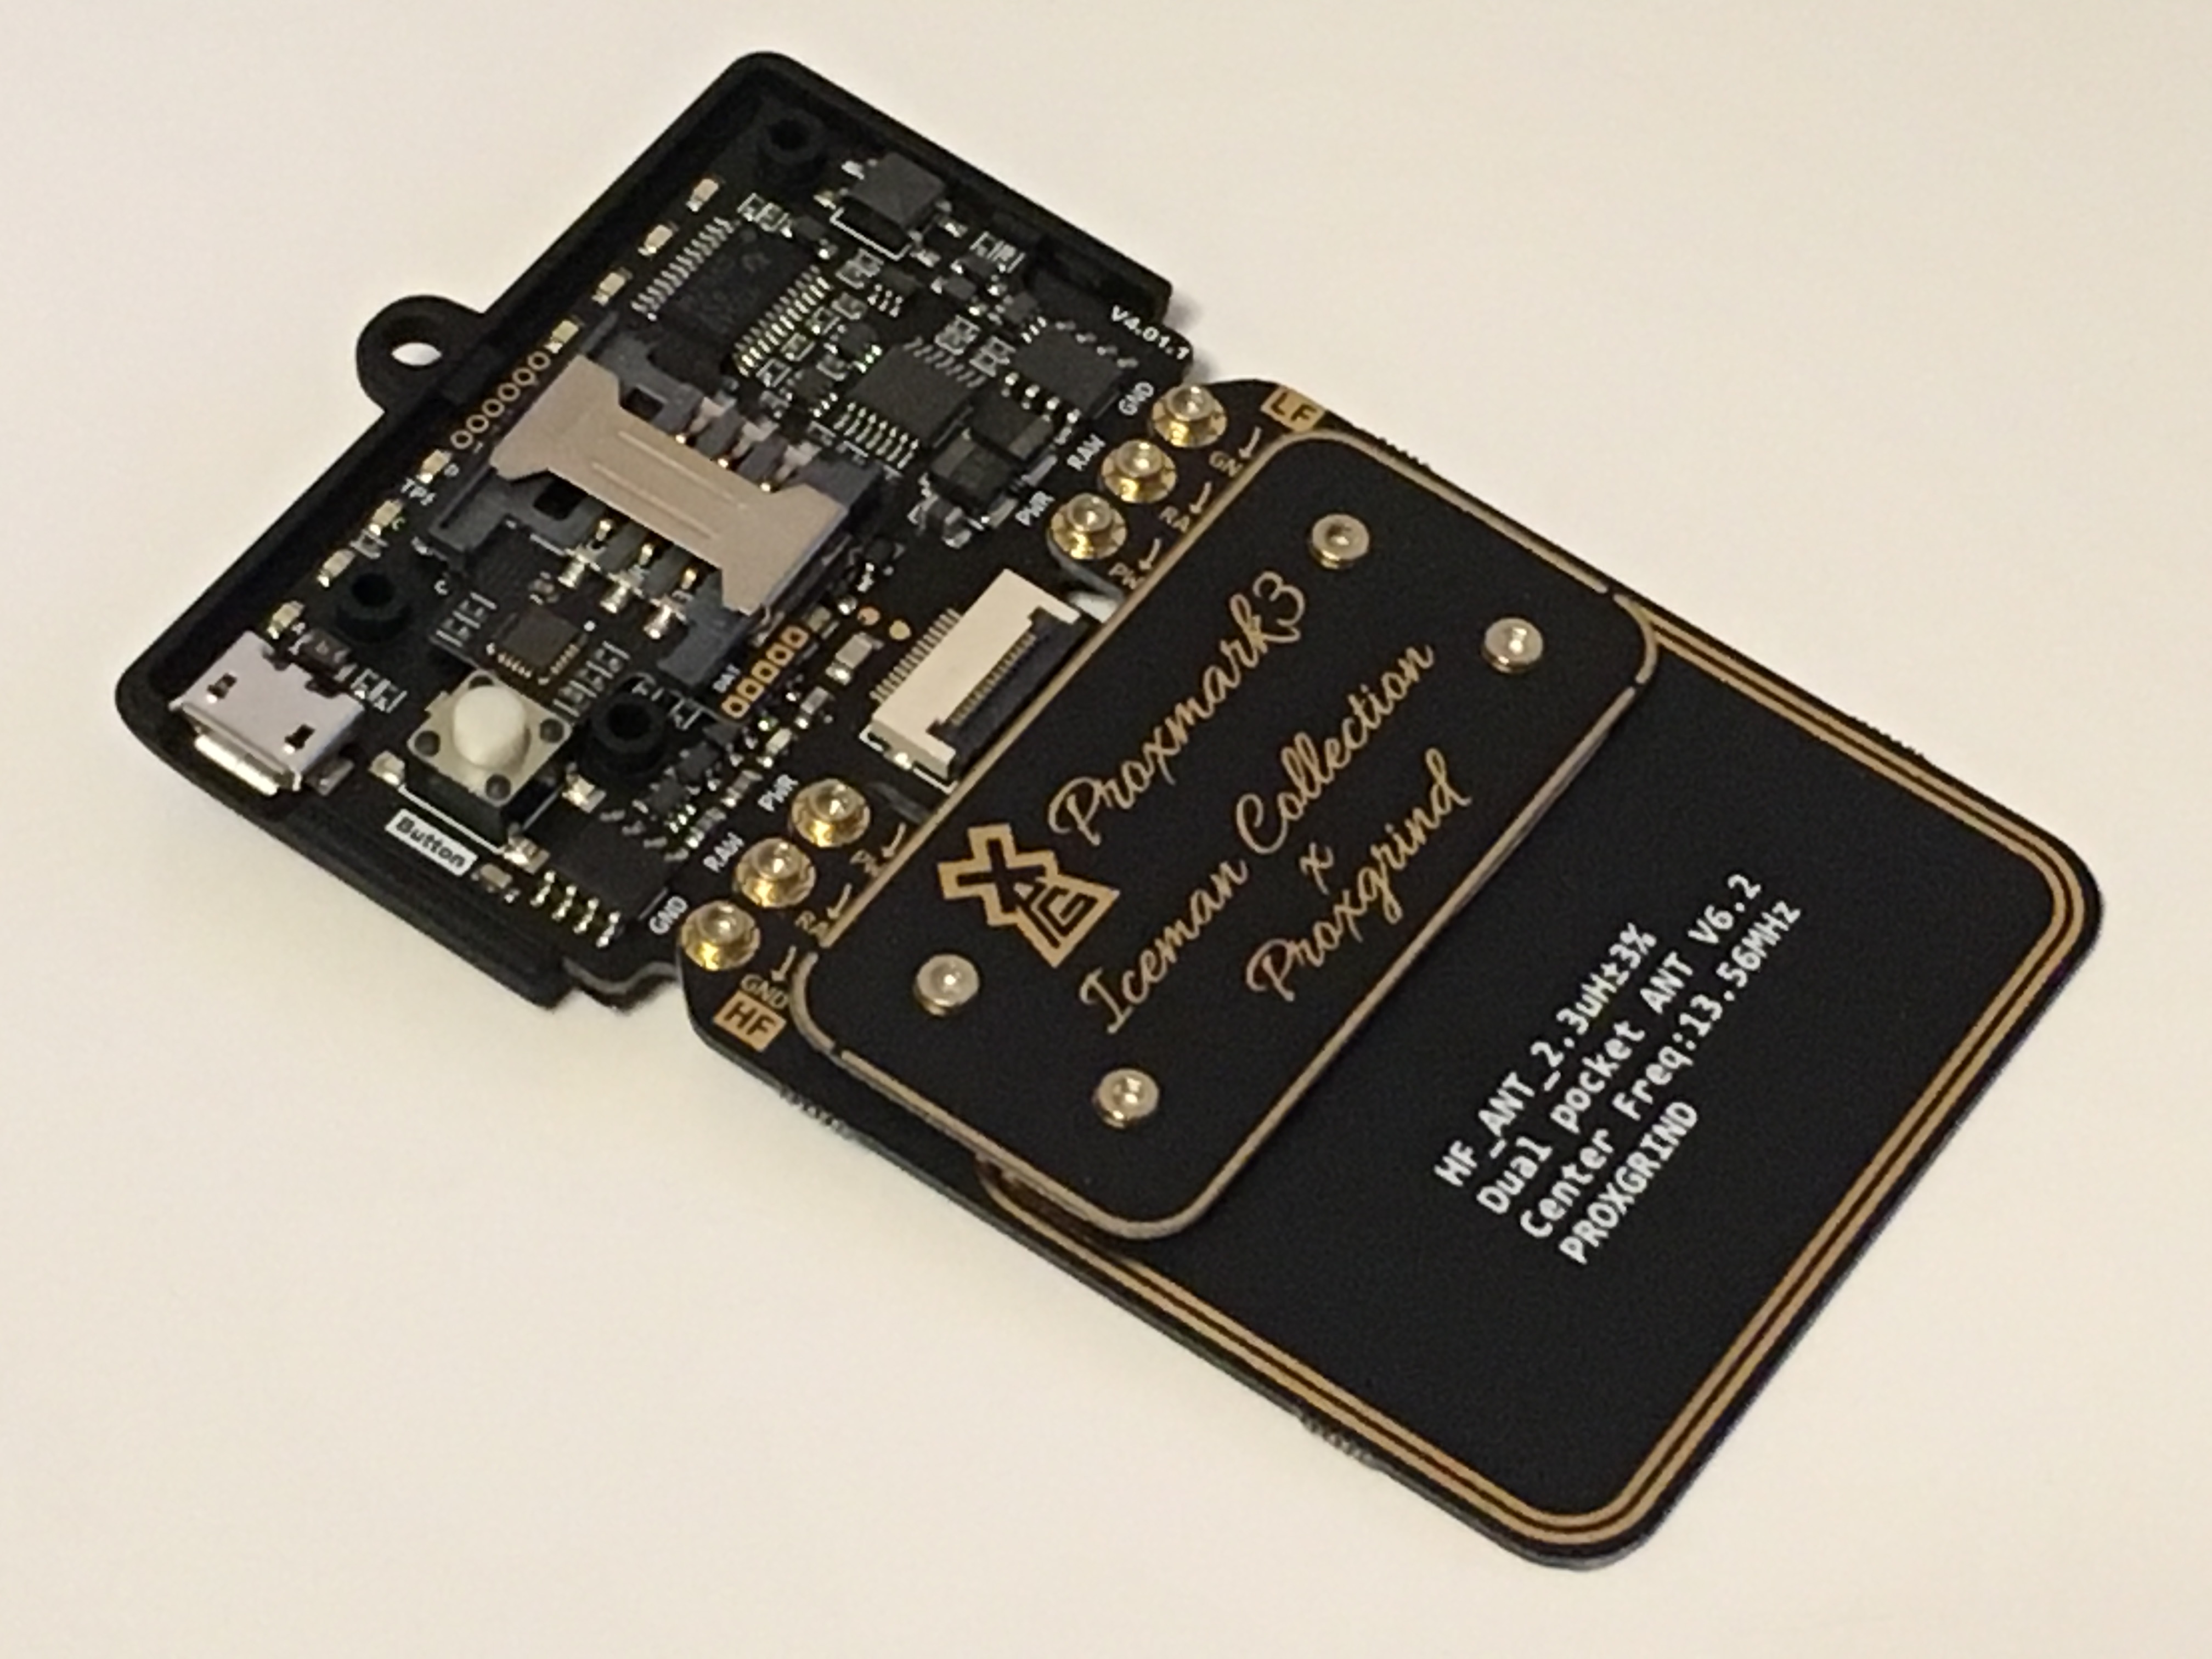
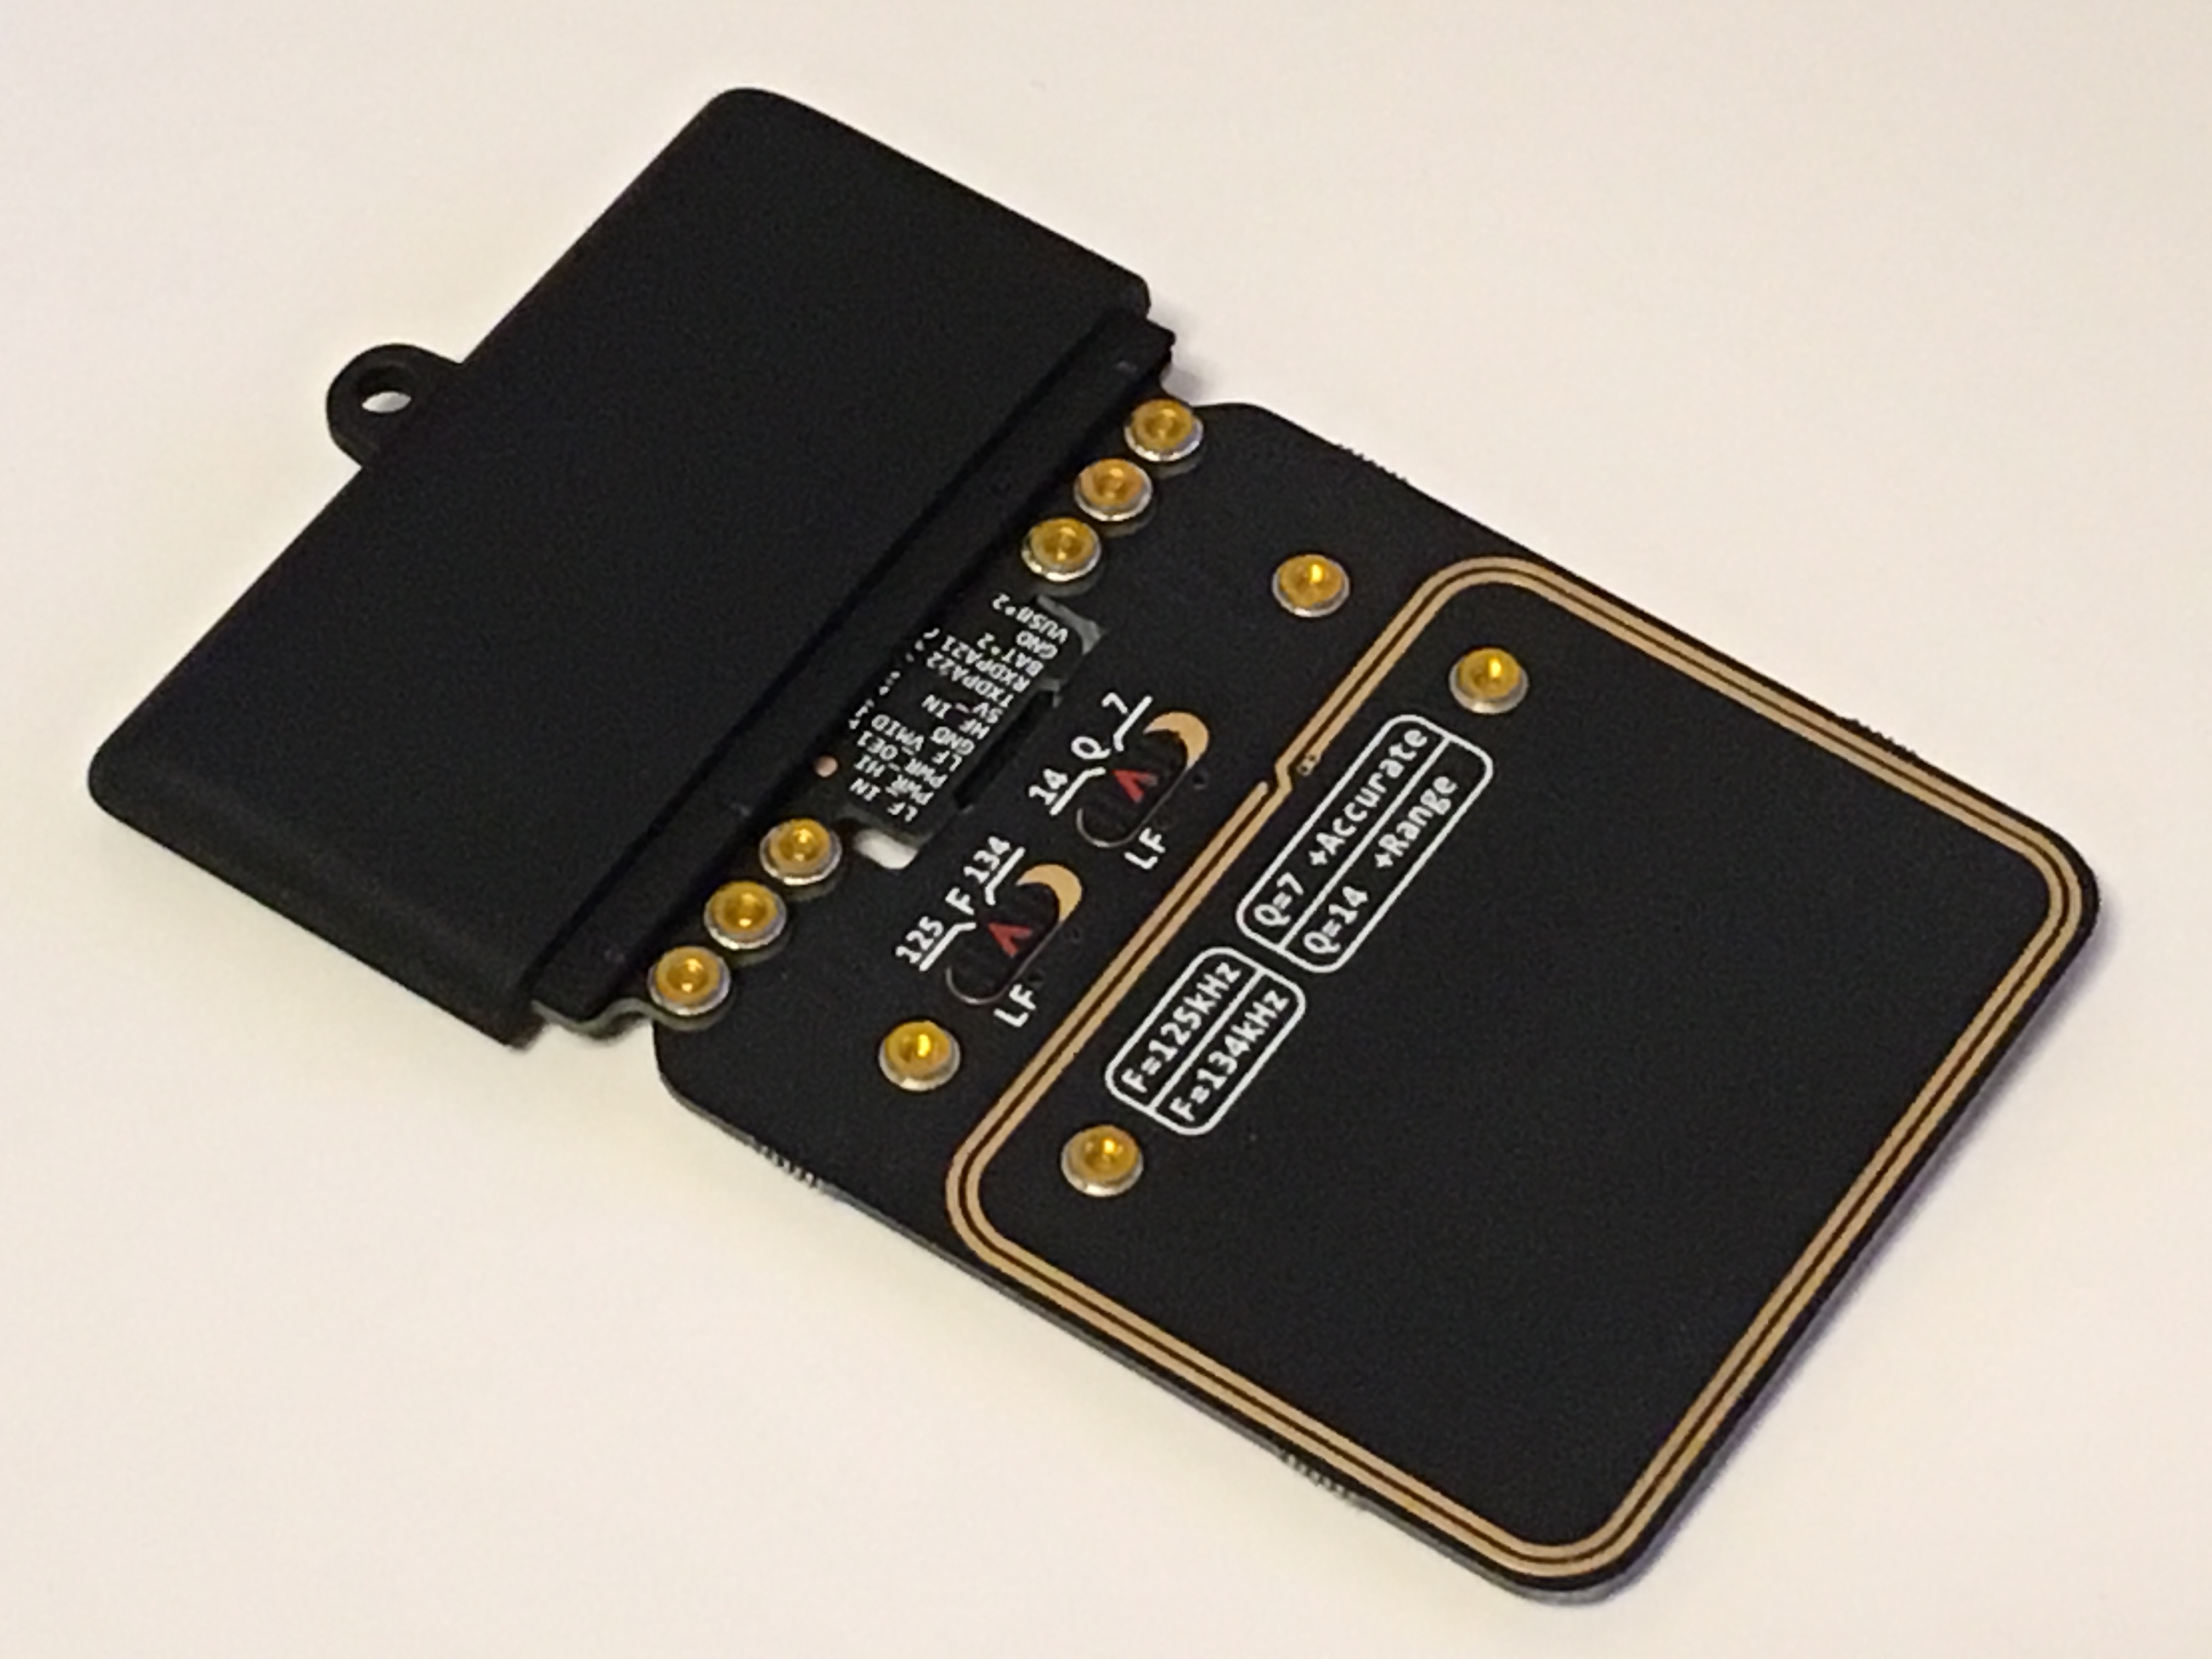
Anyway, opening up the (really nice) case, this is what the inside looks like.
It looks like I am being forced to use “brew” to do this, I am not a fan of brew because I don’t know where it is putting files and want to keep my laptop clean. I already wiped the laptop last month to git rid of a lot of “garbage” installed by things like brew. I created a throw away account on the laptop and going to use it to do the things that require brew. I just finished setting up brew and wrote up the below post as I was doing it.
https://www.drassal.net/wp/index.php/2021/02/05/installing-macos-brew-without-sudo
I am following this guide to setup the proxmark3 software, and after setting up brew, it was actually quite straight forward.
Based on this guide
https://github.com/RfidResearchGroup/proxmark3/blob/master/doc/md/Installation_Instructions/Mac-OS-X-Homebrew-Installation-Instructions.md
After entering the terminal, and setting up your path for brew (if necessary) running the following three commands should get everything automatically setup, it will take a while to download and compile so grab a drink or coffee while waiting.
brew tap RfidResearchGroup/proxmark3
If you have don’t have the “Blue Shark” accessory run this command next.
brew install proxmark3
If you do have the “Blue Shark” accessory run this command.
brew install –with-blueshark proxmark3
Go grab a drink or coffee while it runs and hopefully there are no errors. Once this is done use the below command to update the the proxmark3 hardware. Hold the button as the USB is connected, if the LEDs turn off when the button is released the bootloader is old, repeat the process but hold the button down through the whole bootloader update process.
pm3-flash-all
In my case I got this error message
[!!] 🚨 ====================== OBS ! ===========================================
[!!] 🚨 Note: Your bootloader does not understand the new CMD_BL_VERSION command
[!!] 🚨 It is recommended that you first update your bootloader alone,
[!!] 🚨 reboot the Proxmark3 then only update the main firmware
So, according to the guide I ran the command for updating the bootloader only.
proxmark3 /dev/tty.usbmodemiceman1 –flash –unlock-bootloader –image ~/usr/local/share/proxmark3/firmware/bootrom.elf
After it completes release the USB button, put the proxmark3 back into bootloader mode by holding the button while plugging in the USB, this time two LEDs should stay lit after releasing the button.
Proceed to update the main firmware by the following command
proxmark3 /dev/tty.usbmodemiceman1 –flash –unlock-bootloader –image ~/usr/local/share/proxmark3/firmware/fullimage.elf
Note, “fullimage.elf” refers to the main application image, not including the bootloader, confusing, but this is how the proxmark3 does it.
After this is done just to be sure you are on the right firmware version reconnect the USB without holding down the button then run the following command to enter the client.
pm3
Enjoy playing with the proxmark3!
I’ll be posting some things later about the proxmark3 as I have time to test things out with it.